
Thinking About Starting a Podcast? Here's What You Need to Know About Creating a Studio
Introduction: Everyone Starts Somewhere
Your morning might begin with coffee or a dog walk—but definitely with your phone. Scrolling through news, email, and yes—podcasts.
If you’ve been thinking “I could do that too,” you’re probably right. You have something to say, and the world wants to hear it. But where do you start?
In this guide, based on our real-world experience building a professional podcast studio, we’ll walk you through every step of the journey—plus show you how you can skip the hard part and get straight to recording.
🎙 Step 1: Define Your Podcast Format
Before you buy gear or rent space, decide:
Will you be hosting solo or interviewing guests?
Will you need one mic or four?
Do you plan to be on video or just audio?
This shapes everything—from your setup to your editing needs.
📍 Step 2: Choose a Location
Home Studio vs. Renting
Own Studio: Always ready, consistent setup, but limited background variety and high cost.
Changing Locations: Visual variety, but more setup time, permission issues, sound variability.
For most podcasters, building a DIY studio gets expensive fast. A professional rental like ours solves this with perfect conditions—without the investment.
📐 Step 3: Studio Requirements
Space
Avoid placing chairs against a wall. Your set needs depth. Without it, your video will look flat and lifeless. You’ll want at least a few feet behind you, or consider using a green screen.
Soundproofing
Great sound comes from:
Proper acoustic panels
Minimal echo
Controlled external noise (ideally in a quiet building or basement)
Building this at home can cost thousands. Or you can book a sound-treated room ready for recording.
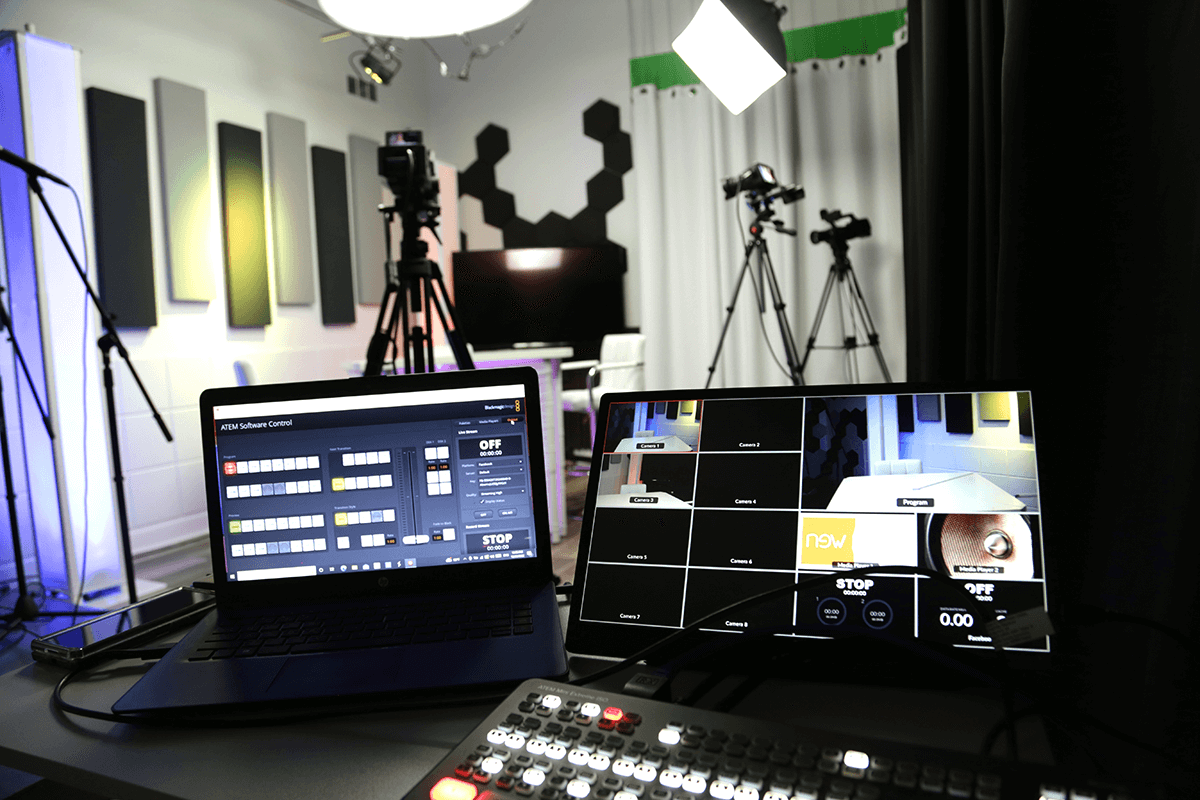
🎥 Step 4: Cameras and Lighting
Phones can record okay video—but only with manual settings, perfect lighting, and single-camera shots.
Photo Cameras (DSLRs/mirrorless) are better, but may overheat or shut down during long takes.
Video Cameras are best for multi-angle podcasting. Built for long sessions, consistent image quality, and fewer headaches.
Lighting
Lighting makes or breaks your video. A proper setup includes:
Key light (main)
Fill light (softens shadows)
Back light (adds separation)
Background light (adds depth)
If that sounds overwhelming, don’t worry—we’ve done all this for you.
🎤 Step 5: Sound Equipment
Dynamic Mics: Durable, less sensitive to background noise, but you need to stay close.
Condenser Mics: Clearer sound, more sensitive to your surroundings. Needs phantom power (most mixers support it).
Add a mixer if you’re recording multiple voices or need real-time sound monitoring.
🎓 Step 6: Learning Curve
You can absolutely DIY everything—but it takes:
Time to learn gear
Budget for mistakes
Patience when troubleshooting
Or you can just book a professional studio and focus on what really matters: your voice, your story, your audience.
👋 Want to Skip the Hassle?
We’ve built our podcast studio so you don’t have to. Located in Northeast Philadelphia, it’s ready for:
One-on-one interviews
Group shows with up to 4 guests
High-quality video and sound
Multiple backdrops—including greenscreen
Affordable rates starting at just $70/hour
🎯 Book a Free 30-Minute Studio Tour
Come see how our space works, ask questions, and decide if it’s the right fit for your podcast.
| Option | DIY Studio | Snappuchino Studio |
|---|---|---|
| Cost | $2,000–$10,000+ upfront | $70/hr, no setup costs |
| Time | Weeks of setup and testing | Ready-to-record today |
| Quality | Depends on experience and budget | Professional-grade every time |
| Support | Self-guided | On-site tech help available |
💡 Final Thoughts
Creating a podcast is exciting—but the technical hurdles can stall your launch. We help you start faster, easier, and more professionally.
Ready to see the studio? Let’s talk.